Step-by-step guide
- Start by creating a leg filter that will catch all flights you like to send Gendecs for:
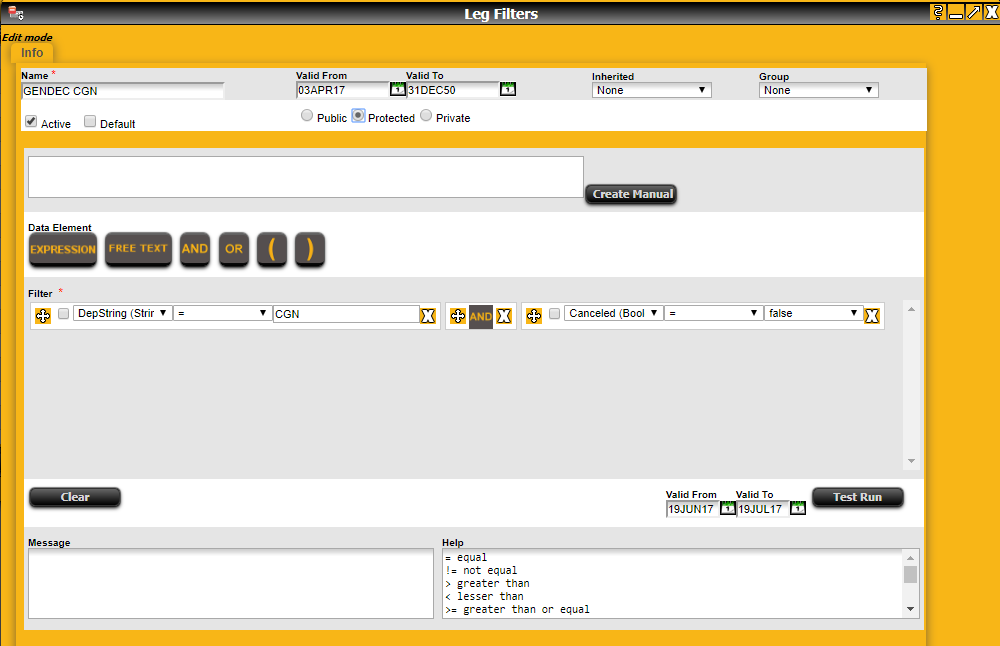
This one will select all flights from CDG that isn't cancelled. Make sure to tick 'Protected' so it will not be changed by mistake.
- Open the APIS dialogue from the top left wheel.
Create a new one and for simplicity's sake name it the same as the filter:
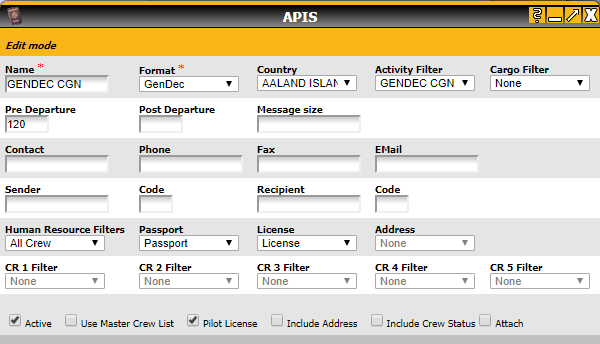
What is important here is the 'Format' and the 'Activity Filter' and 'Pre Departure' that controls how early the Gendec should be sent.
Normally the 'Human Resource Filters' should catch all crew. For 'Passport' and 'License' you choose which document to use. To enable 'License', you need to tick 'Pilot License'.
Most of the other settings are only relevant for setting up APIS.
Don't forget to tick 'Active' before you save.
- Open 'Automation' from the top left wheel and the tab Events and click new:
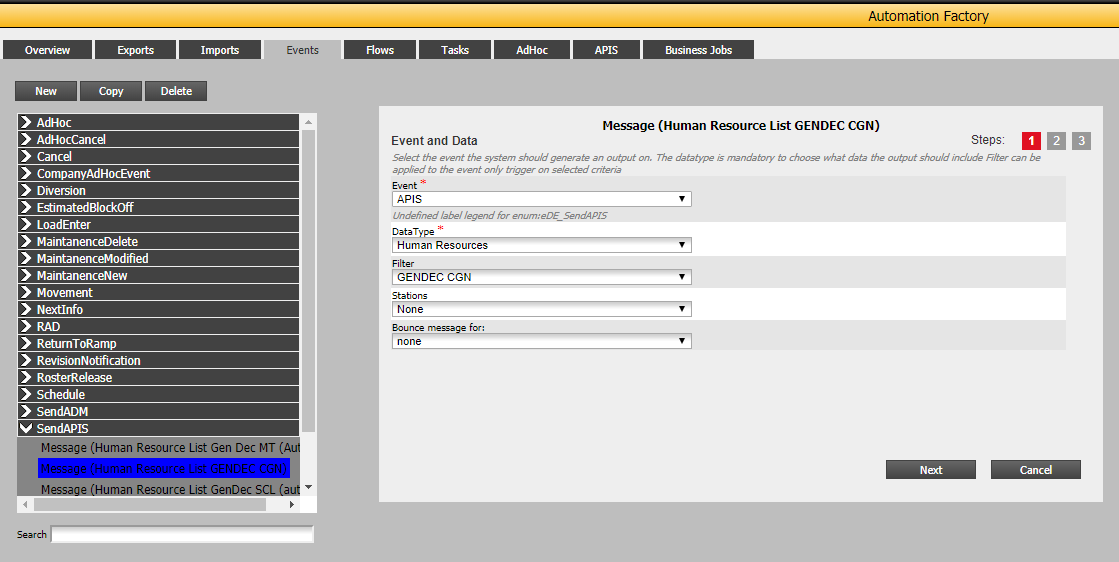
'Event' should be 'APIS' and 'Data Type' 'Human Resources'. In 'Filter' you select the APIS setup you created in the previous step. Press 'Next' ('Bounce messages for:' is non functional for APIS/Gendec).
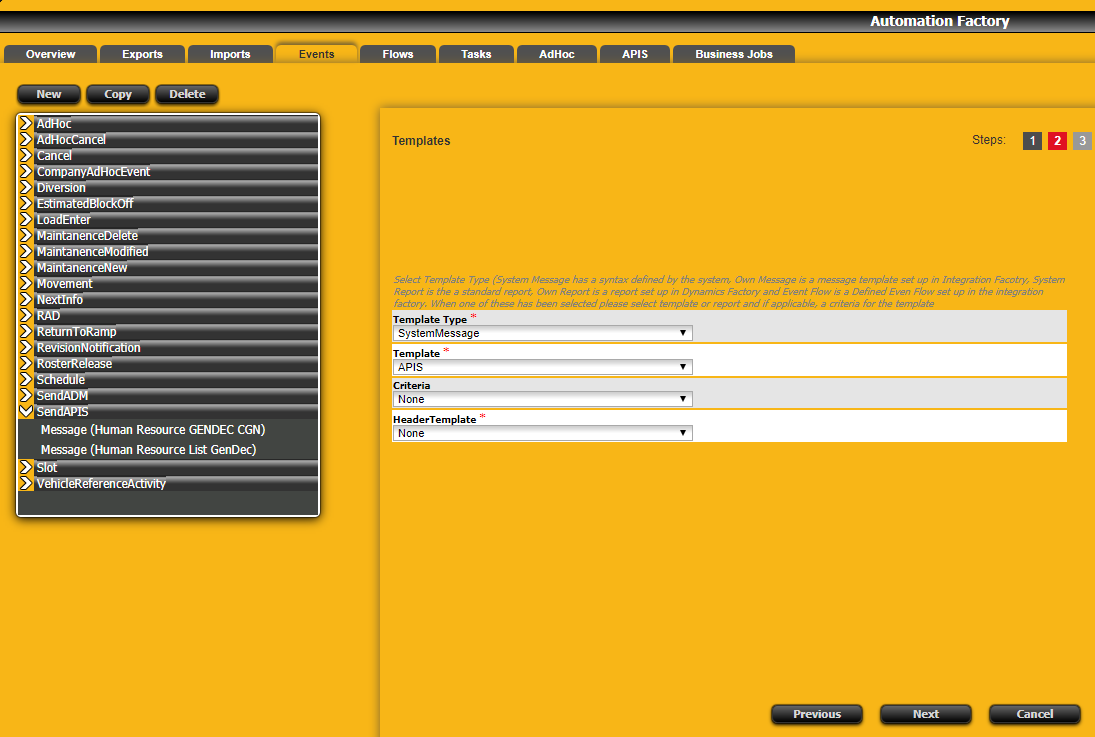
Select the options as above and press 'Next'
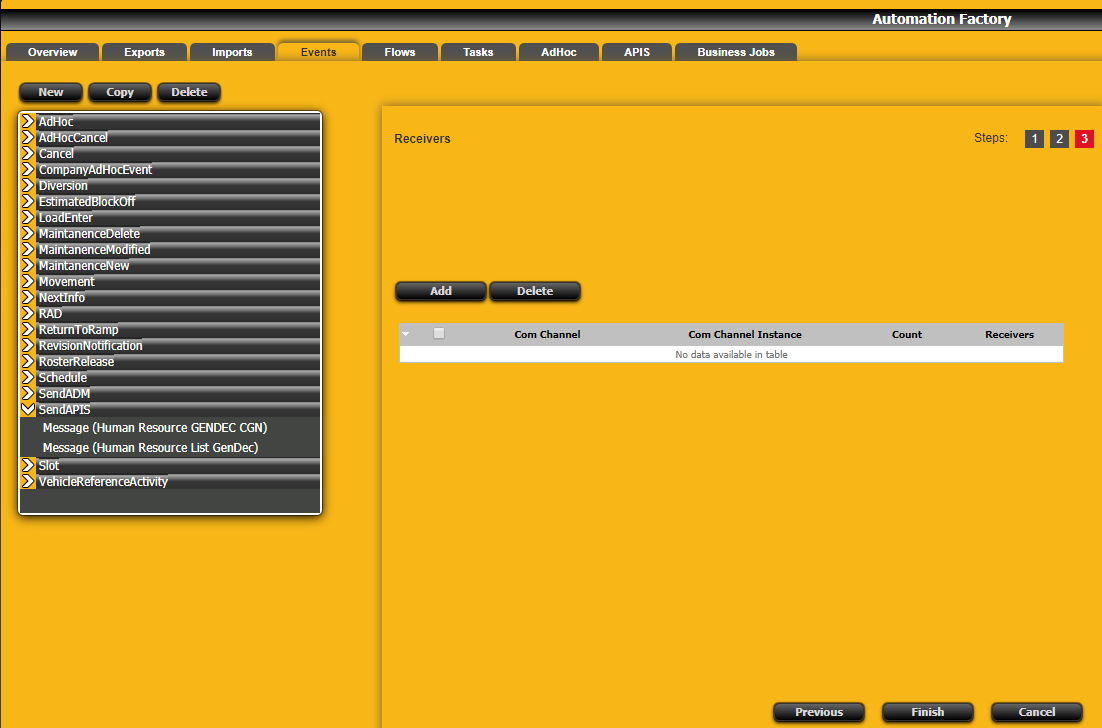
Press 'Add'
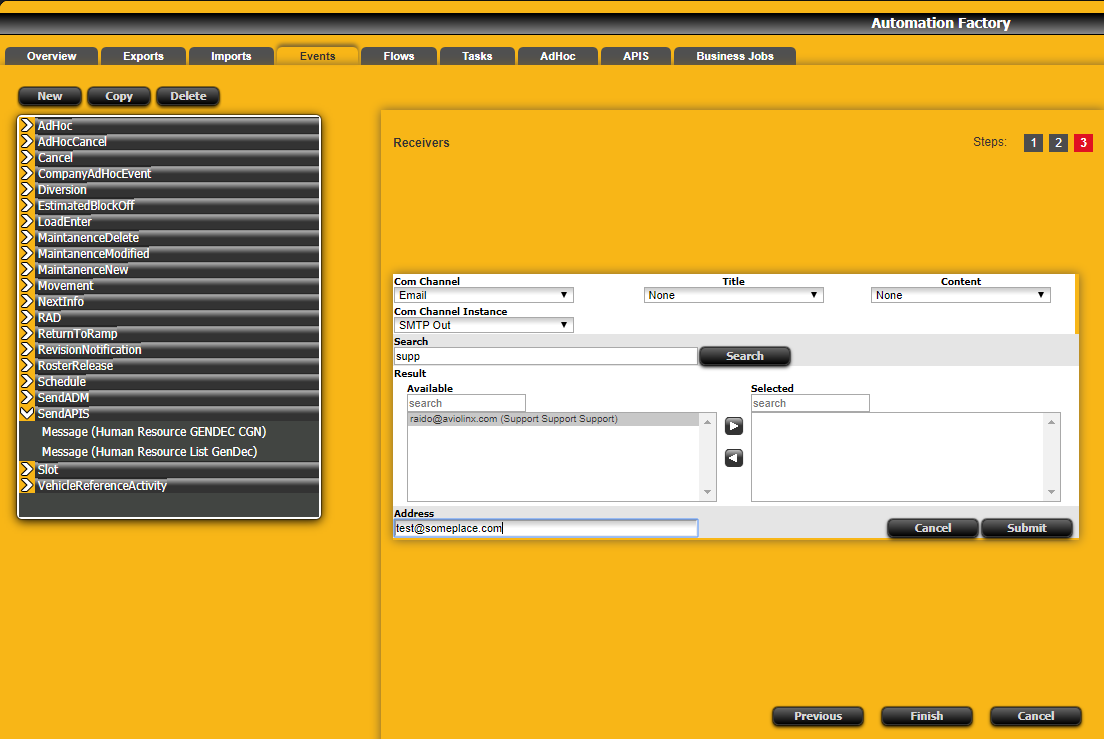
- Add 'Com Channel' type 'Email' and choose a 'Com Channel Instance' (you can choose Any, but then if you have more than one, it will be a random pick which will be used).
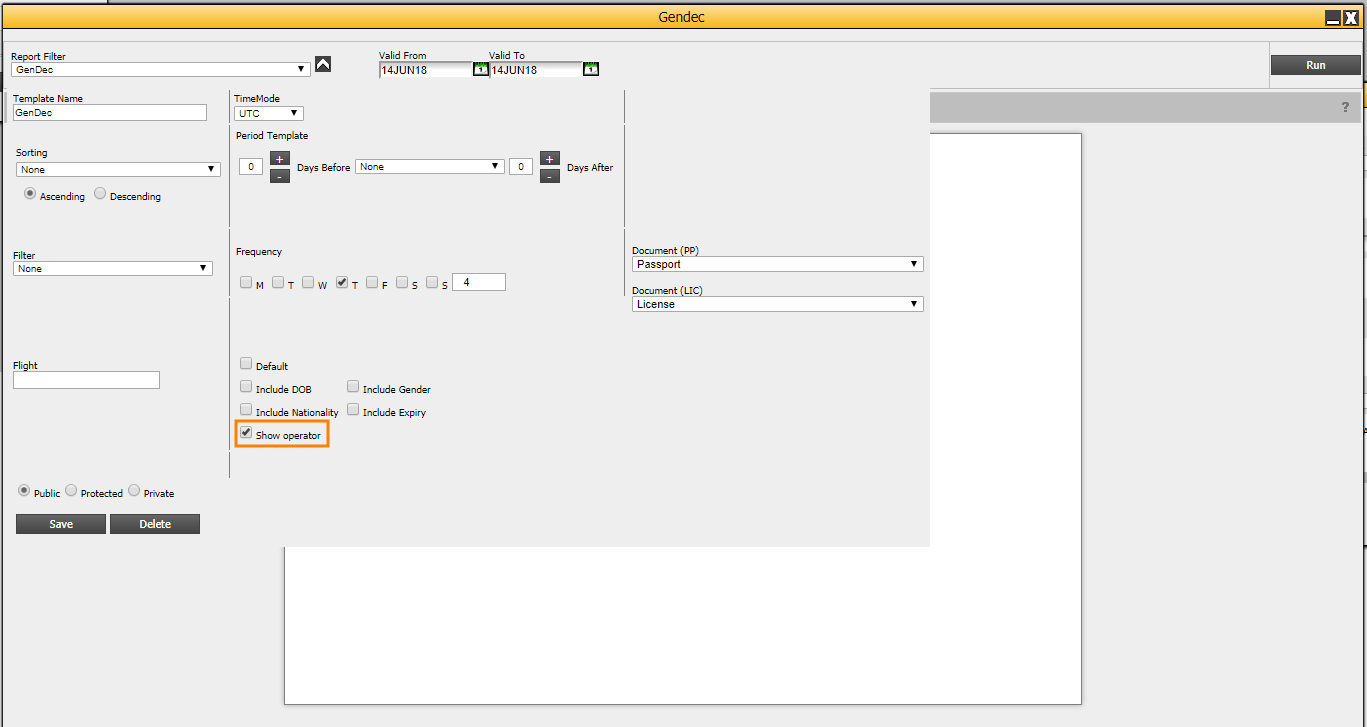
You can search for email addresses in the system and add to the 'Selected' panel, or add the addresses separated by semicolon in the 'Address - Update: You can now create a Gendec report filter (2), and use it directly in the APIS configuration dialog (1) by selecting a report filter. Selecting this option will
disable the passport and license settings in the APIS configuration. Please not that you must first select 'Format' as GenDec to make the option visible.
There is also a new 'Show Operator' option (2) in the gendec report that is not available in the APIS configuration, so you will need to use the report filter option to use that. (1)
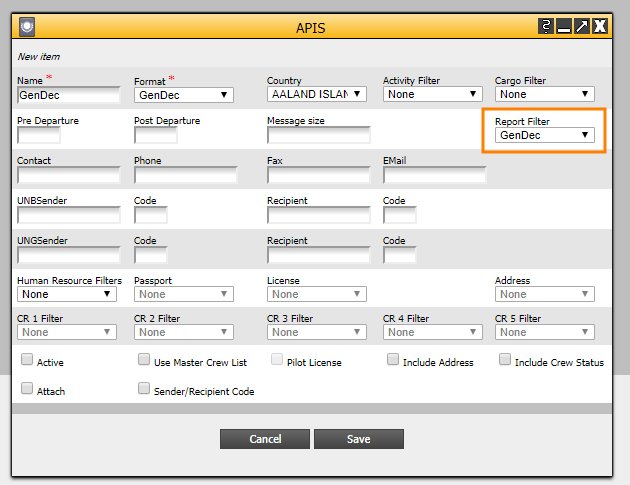 (2)
(2) 