This article describes the processes of creating and maintaining schedules and adhoc schedules in the N-OC system.
Prerequisites
To create schedules in the system, there are certain prerequisites that must first be defined:
- Data
- Companies
- Prefixes
- Suffixes
- Seasons
- Aircraft Types
- Versions
- Configurations
- Service Type Codes
- Stations and Terminals
- Default BLH (Distance)
- Turnaround Times
- IATA Rules
- Company Rules.
- Messages and Receivers
Note: For more information, please contact your administrator.
To open a New Schedule window, right-click in the Gantt on the aircraft registration row until this window appears:

Note: Where you click on the Gantt determines the proposed STD shown in the schedule window.
Field | Image |
New Schedule icon |
|
Ad-Hoc Schedule icon |
|
Aircraft Reference Activity icon |
|
Turnaround (Ground Times) icon |
|
Maintenance Schedule icon |
|
Timetable Detailed Rule Check icon |
|


Creating a New Schedule
- Select the Sche. icon.

- Click to see a schematic display of the new scheduled flight.

The Schedule Header

Creating and maintaining schedules are presented in logical steps. There are two steps in the wizard:
- Edit step
- Message step.
Note: The wizard header displays the current step in the process (in red), and the next step (in grey).
The Flight Identifier Panel

The user enters the Airline code, Flight Number and Suffix in the Flight Identifier Panel. Complete all mandatory fields.

Note: Project and Call Sign are optional fields.
Example for a ‘Project’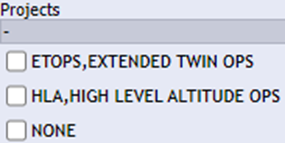
The Calendar Panel

The user enters period information for the schedule in the Calendar Panel.
Field | Description |
Valid From | The start time for the schedule (which defaults to where the user pointed at with the mouse in the Gantt). |
Valid To | Set the end date. |
Time | STD / ETD. |
Frequency | Days of the week when the schedule operates. |
Weekrate | If the created flight schedule operates weekly or bi-weekly. |
Time Mode | Only UTC available for the moment. |
The Route Panel

Single leg: The user defines the routing in the Route Panel. The route must have a minimum of two stations, and can be up to a maximum of nine stations.
Note: Only active stations are shown in the drop-down list.

If the user wants to activate a station that is not currently available from the dropdown, they should select the button. The user is presented with a window like shown below.

The search option includes any of the following:
- Airport name
- IATA code
- ICAO code.

The button makes the airport station available in the system.
Multi-legs:
Click the button to create multi-leg flights (i.e. fork flights) and select additional station(s).
Example: ARN > LHR > CDG.

Note: The ![]() above the third station is for deletion.
above the third station is for deletion.
The Note / Action Panel

The action panel has two functions: Notes and New Flight Schedule creation.

- Note The ‘Note’ is activated by clicking the arrow on the left side of the panel. The note can be stored either as an ‘SI’ (Supplementary Information) and it will only be part of the system, or as a Schedule Note (a predefined note type) and is stored in the system.
There are two buttons to copy an SI Note to a Schedule note and vice versa. The scheduled note will optionally be shown on the leg puck on the bottom left side (not implemented yet).
Note: A ‘Notetype’ must be defined. - Create the legs of the New Flight Schedule. The user can create a new flight for any given season through this function.

Insert the following information:
- Airline Designator
- Flight Number
- Suffix (Optional)
- Project (Optional)
- Call sign (Optional)
- Valid From
- Valid To
- Frequency
- Week Rate
- Date Mode - UTCl
- Route.
The Leg Panel

- Select the button.
- A new schedule editor row displays at the bottom of the window.
- Enter the required Schedule information about the route, departure and arrival times, equipment, version, configuration, and STC. Note: The system uses the default BLH (Block Hours) for the specific aircraft type, period, weekday. The values are set in the ‘Distance’ tab in the station window. The default version and configuration for the leg is set as well.
Example: The route and schedule times have already been created.

Creating a return schedule
- To create a return routing, click the RETURN button.
- The system creates the outbound routing, but in reverse (return leg based on the original city-pair with the ‘next’ flight number which can be modified), bringing it back to the starting point. Note: This function also uses default BLH, and default turn around times, as pre-defined in the system.

Note: A minimum of selecting a Service Type Code ‘STC’ is mandatory.
The four subdivisions at the top when clicking one of these icons:


The user can change the following:
- terminal information
- times
- equipment
- service type codes (STC).
These four icons are shown on the right side and store additional information for the leg.
Field | Icon | Description | Image |
| Flight Data |  | Set the onward reference, aircraft owner, and codeshare. Refer to: Onward Flights concept. |  |
Service | | Enter ‘Meal codes. |
|
Crew | | Set Cockpit and Cabin Crew. |
|
PAX | | The user may edit passenger booking related information. |
|


Note: You will find the notes in the dropdown in the schedule window.
The function to add traffic restriction on a segment is now added. There is currently no validation if traffic restrictions are not to be combined according to SSIM manual or to add multiple traffic restrictions of the same code. This will be implemented later.
In the service tab in additional dialog in the schedule dialogs (New Schedule, New AdHoc, Edit Schedule and Create AdHoc from Schedule, there is a possibility to add a traffic restriction code to a segment. This will be part of a NEW scheduled SSM and ASM message and the ADM message (if only changing this part of a schedule).
Two Step Process
The process of creating, editing, deleting, etc. in N-OC usually follows two common steps:
 The Step Panel
 By clicking Next in the step panel, the user proceeds to the next step - the ‘Message’ Page.
 - The Message Page, processes Messaging/Reports/Eventflow tasks and saving. All relevant messages defined in the system will be automatically generated for the newly created flight.

Example:
- The user enters the information and clicks the NEXT button.
- The Messages, Reports, and Eventflow related to the new schedule are displayed.
- These are sent out and processed when the user clicks the SAVE button.
Note: Click the magnifying glass to view and update the Message/Report/Eventflow information before sending.

You may enlarge the various messages by clicking the plus button where the message can be revised/updated, if necessary.


The user can also set a date/time trigger:

Click the SAVE button to save your scheduled flight. The new schedule displays in the Gantt as legs/pucks. 

Adding Notes to the Schedule
There are two types of notes that may be added when creating a new schedule:
- SI - Supplementary Information which are added to the bottom of the standard IATA messages.
- Standard Note - See Editors > Company > Note Types.

Creating an Ad-Hoc Schedule
Refer to the referenced article.
The Rule Check Panel
From the Rule Check Panel, the user can check and ensure that the newly created schedule complies with pre-defined rules (already set up in the N-OC Rule engine).
The status lamp (grey circle) displays different ‘traffic-light’ colors depending on the result of the rule check. After a check is made, a tree-view shows which rules, calculators, or accumulators were used in the rule check. Also, any violations are included.
Refer to the ‘Check’ article for specific details.

